
Ensuring your applications work flawlessly is non-negotiable in software development. Poor software quality costs US companies over $2.08 trillion annually due to defects and bugs — impacting businesses across industries.
But fear not! We’re here to introduce you to Selenide, a dependable tool for UI testing. Selenide simplifies the complexities of testing, making the process more streamlined. Whether you’re a seasoned QA pro or a newbie, this article will help you master the library to deliver top-notch software.
What is UI Testing?
User Interface (UI) Testing is a type of software testing focused on checking the application’s visual components to ensure they function correctly and perform as expected. This testing process verifies that all user interface elements, such as icons, radio buttons, text boxes, toolbars, colors, fonts, checkboxes, windows, and menus, are free from defects and operate effectively.
The goal is to confirm that these elements’ appearance and functionality meet the desired standards and provide a smooth user experience.
What is Selenide?
Selenide is an open-source framework built on top of Selenium WebDriver. It keeps all the powerful features of Selenium but makes them simpler to use. With Selenide, you can focus on the most critical parts of your testing work, making the process smoother and more straightforward.
How to get started with Selenide
Choosing a Test Project
First, we’ll choose a Test Project (Sauce Demo). Our goal is to test two different scenarios. In the first scenario, a positive case, we will go through the process of successfully purchasing an item from the inventory. In the second scenario, a negative case, we will attempt to buy an item not listed in the inventory to see how the system handles this situation.
Configuring Dependencies in Your Java Maven Project Setup
- Start by setting up the project with Java11 and Maven;
- Add the following dependencies to pom.xml file, which can be found in the Maven Repository:
- Selenide: Main framework for UI testing;
- JUnit5: For executing test cases;
- Allure Report: For generating detailed reports after testing.
Creating Test Classes and Writing Test Cases
1. Generate Main Test class
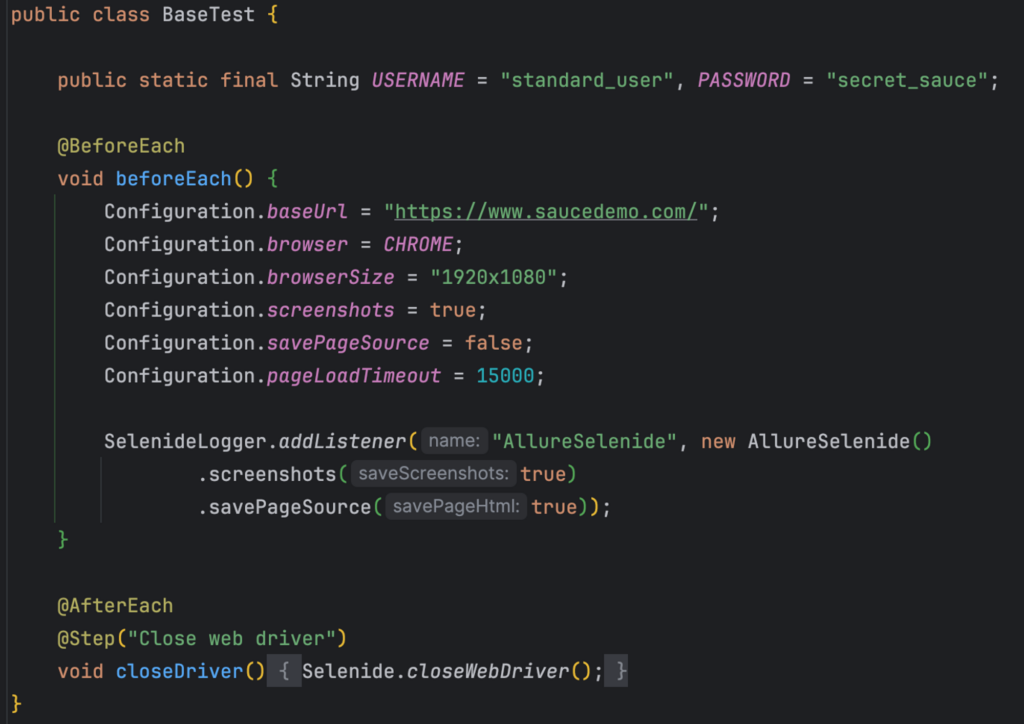
Create a BaseTest class where configured:
a. Within the beforeEach method, define the base URL for the service, configure browser properties, and enable the Allure listener;
b. Inside the afterEach method, execute Selenide.closeWebDriver() to close the browser at the end of each test;
c. To efficiently handle sensitive credentials, consider storing them in a configuration file. For demonstration purposes, I’ve included them here for quicker setup.
2. Generate pages
I will not demonstrate working with locators in the page’s DOM structure. I assume you’re already familiar with the process.
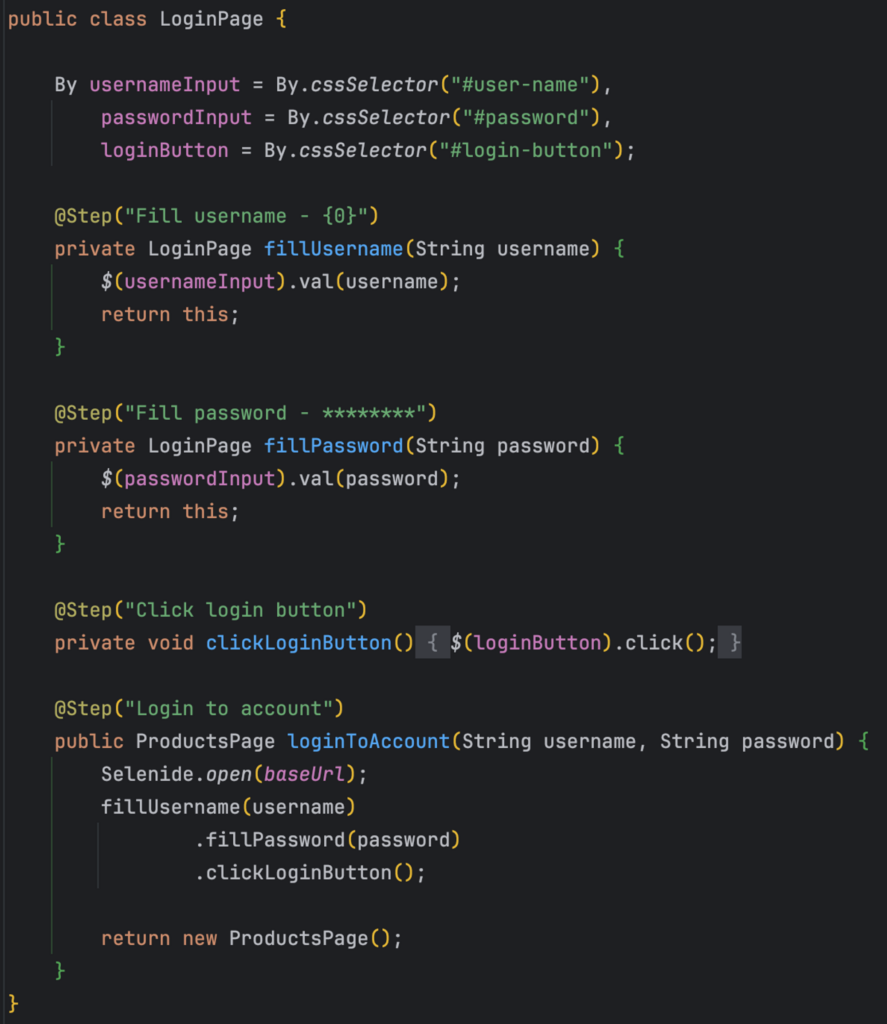
a. Login page. The login page comprises three essential elements: Username, Password, and the Login button. I’ve encapsulated these elements within the LoginPage class and configured the loginToAccount method to populate all necessary fields and trigger the login button. This method returns the ProductsPage class.

b. Products page. After a successful login, the Products page is displayed.
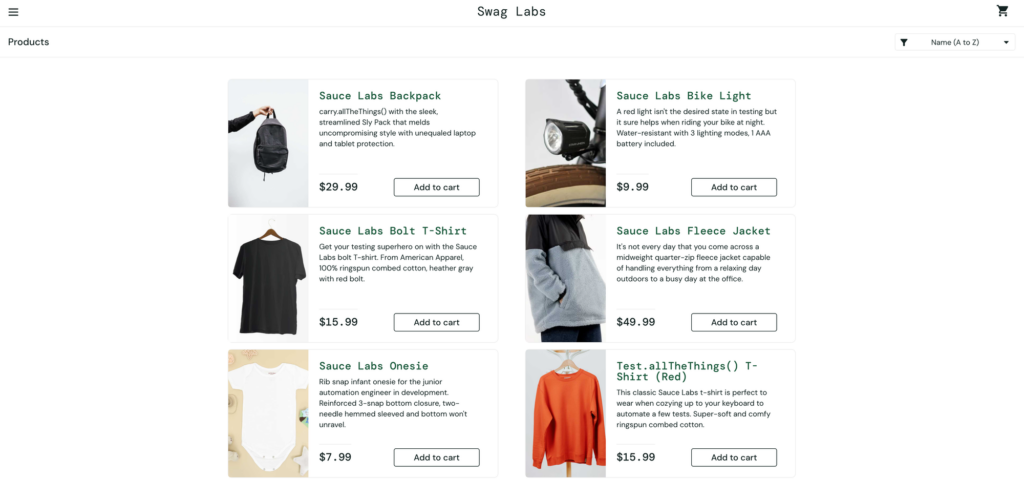
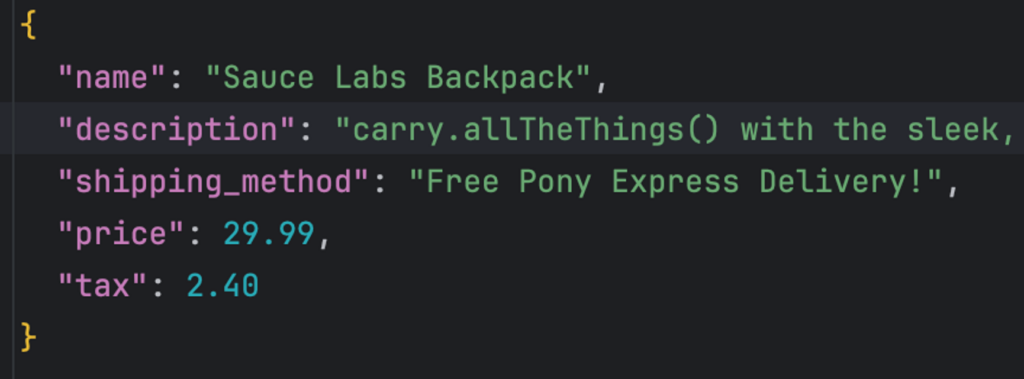
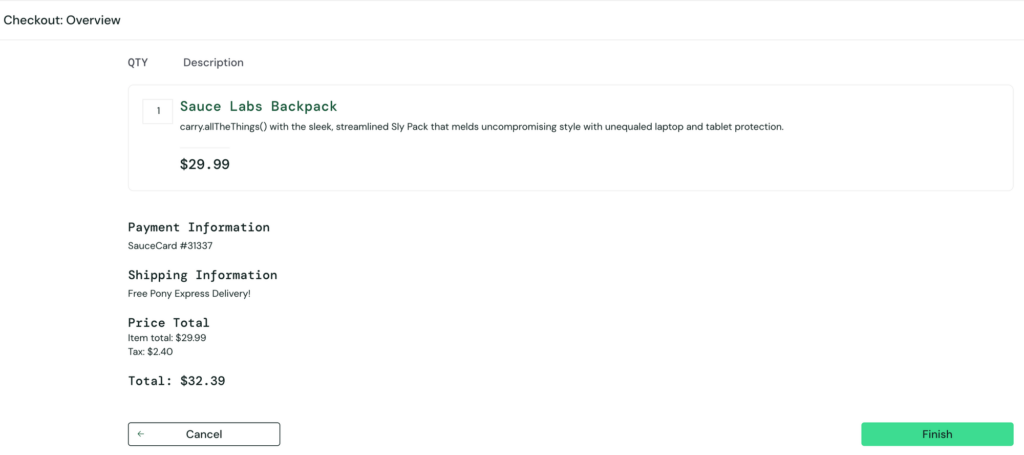
Let’s assume we retrieve a list of items from the backend configured in the test file inventory-item.json. We select the first item, Sauce Labs Backpack, and attempt to purchase it in our UI test.
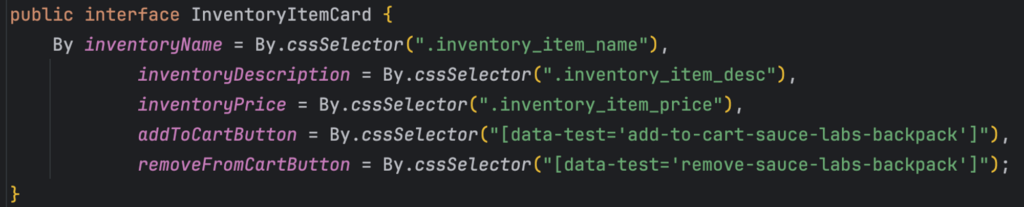
I created the ProductsPage class – managed all locators from the Products page, and implemented the InventoryItemCard and ShoppingCartIcon interfaces.
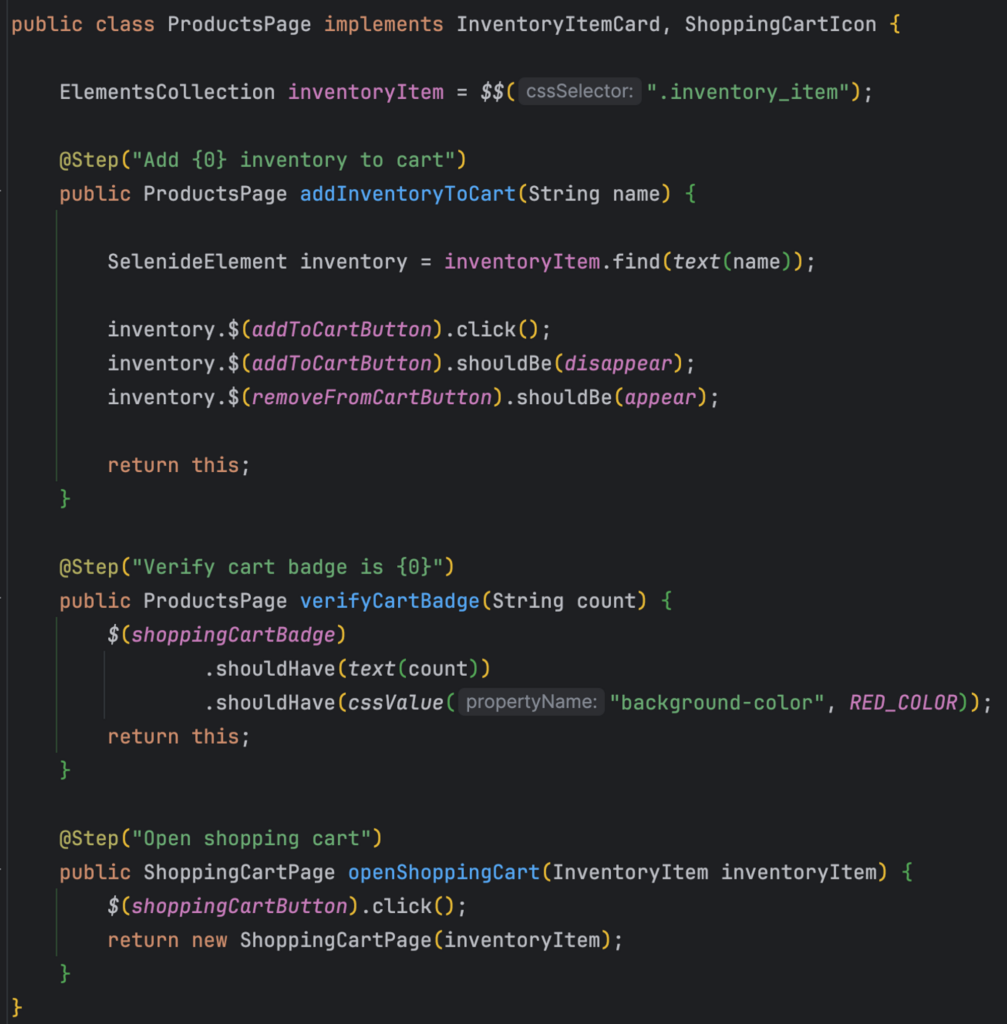

This class also implements three methods:
i. addInventoryToCart – locates an item by its name and clicks the ‘Add to Cart’ button;
ii. verifyCartBadge – verifies the counter displayed in the cart badge;
iii. openShoppingCart – clicks the shopping cart icon and returns the ShoppingCartPage class.
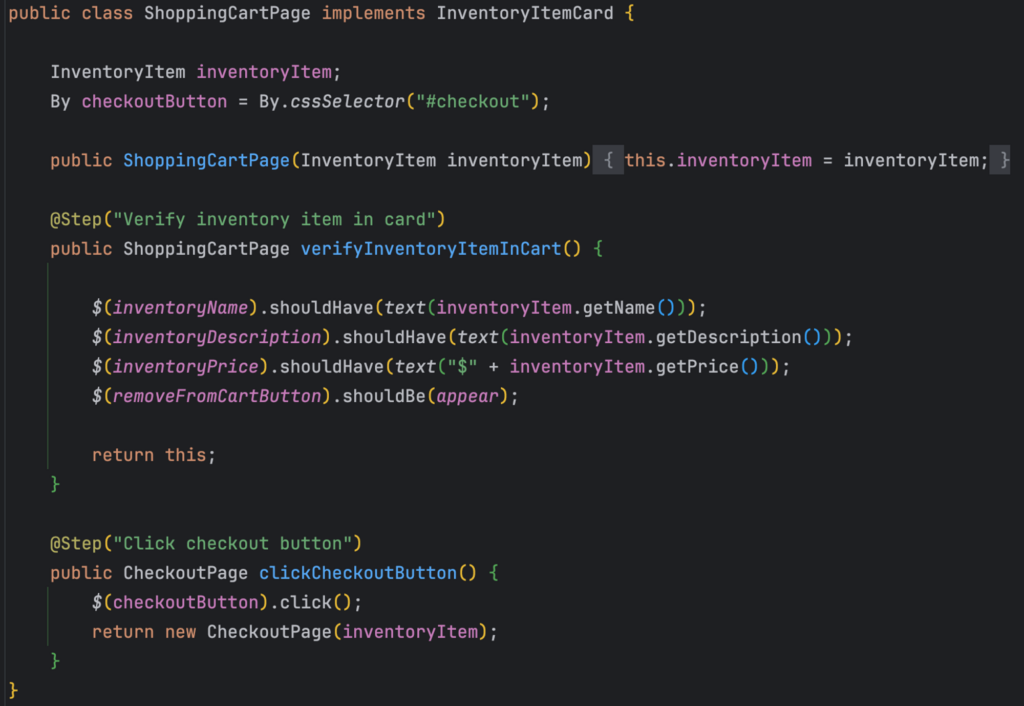
c. Shopping cart page. After clicking the shopping cart button, the page for the shopping cart opens.
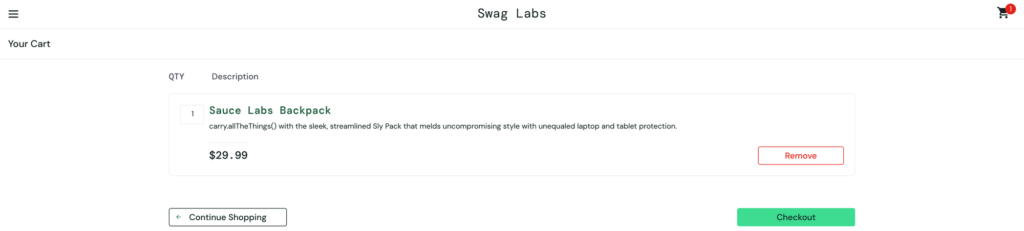
I’ve implemented the ShoppingCartPage class to verify the added inventory item in the cart and to enable clicking the checkout button redirecting to the Checkout page.
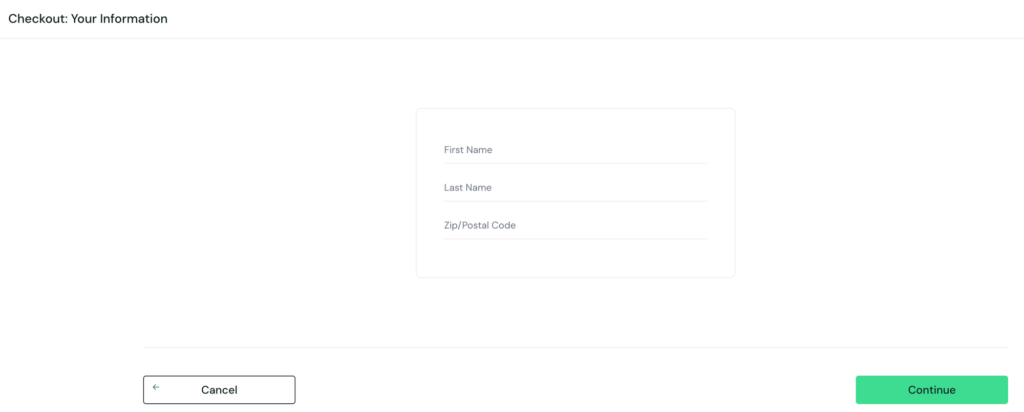
d. Checkout page. After clicking the checkout button, the Checkout and Complete Order page opens. I’ve implemented the CheckoutPage class to manage this page.
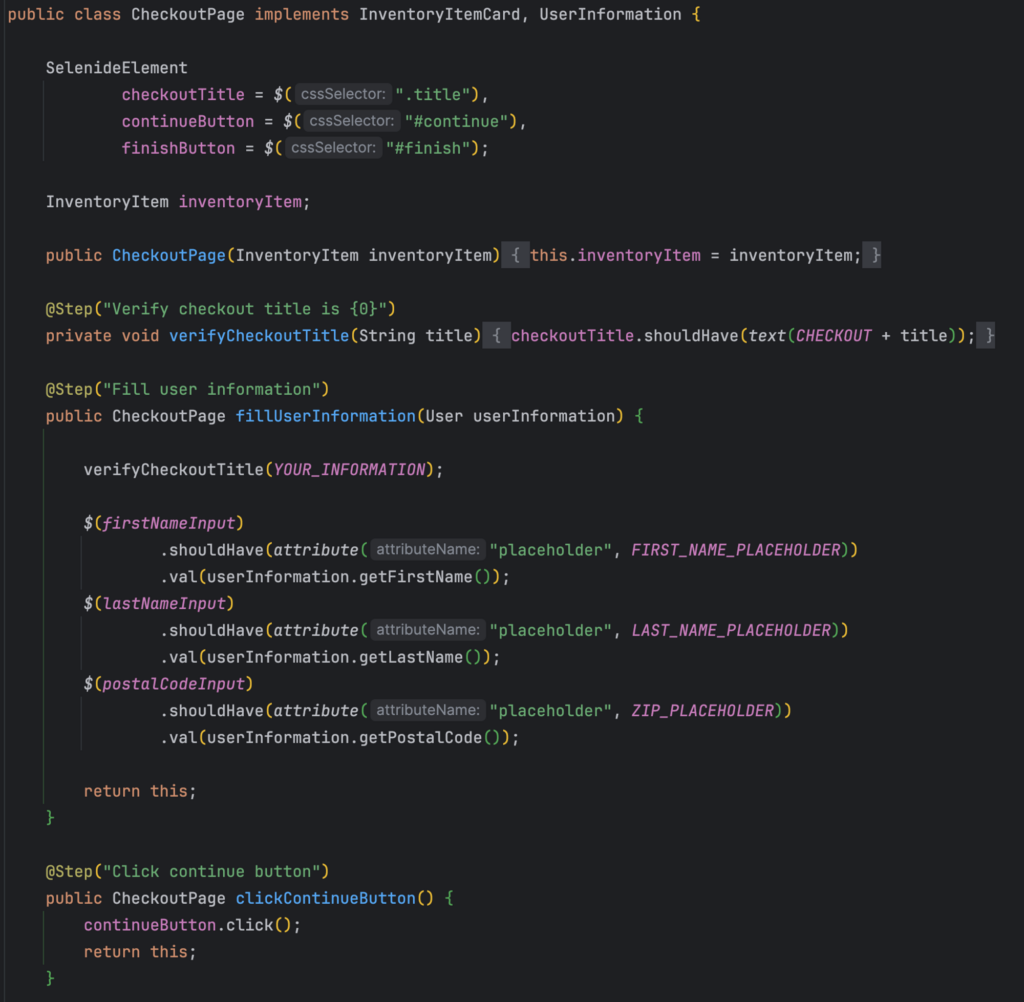
i. Step one involves filling in the User Information. The CheckoutPage class implements the UserInformation interface, where selectors for these fields are collected. In the fillUserInformation function, I’ve implemented verification for placeholders and filled in all the required values for these fields.
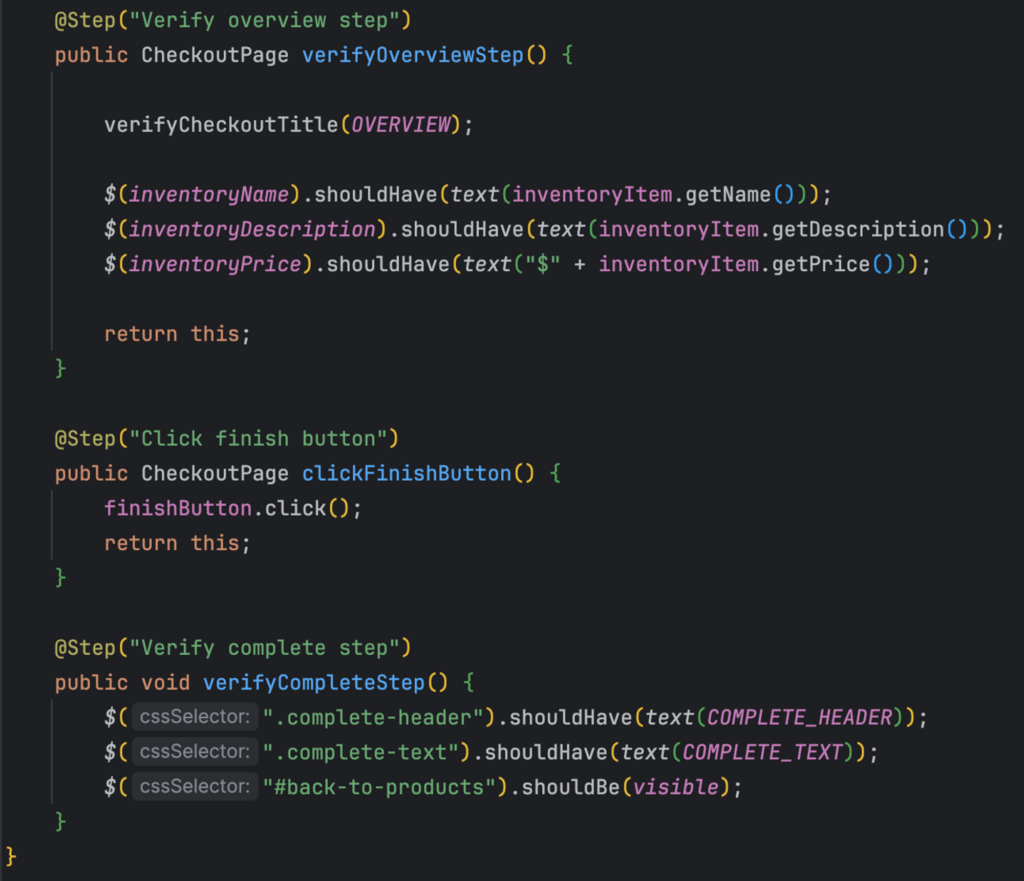
ii. The Overview page opens after clicking the Continue button to verify the order and complete the checkout process. Therefore, I’ve implemented the verifyOverviewStep function to confirm inventory item information and the clickFinishButton function to finalize this process.
iii. After clicking the Finish button, the Complete step opens, where I have implemented verifyCompleteStep to check all wordings.
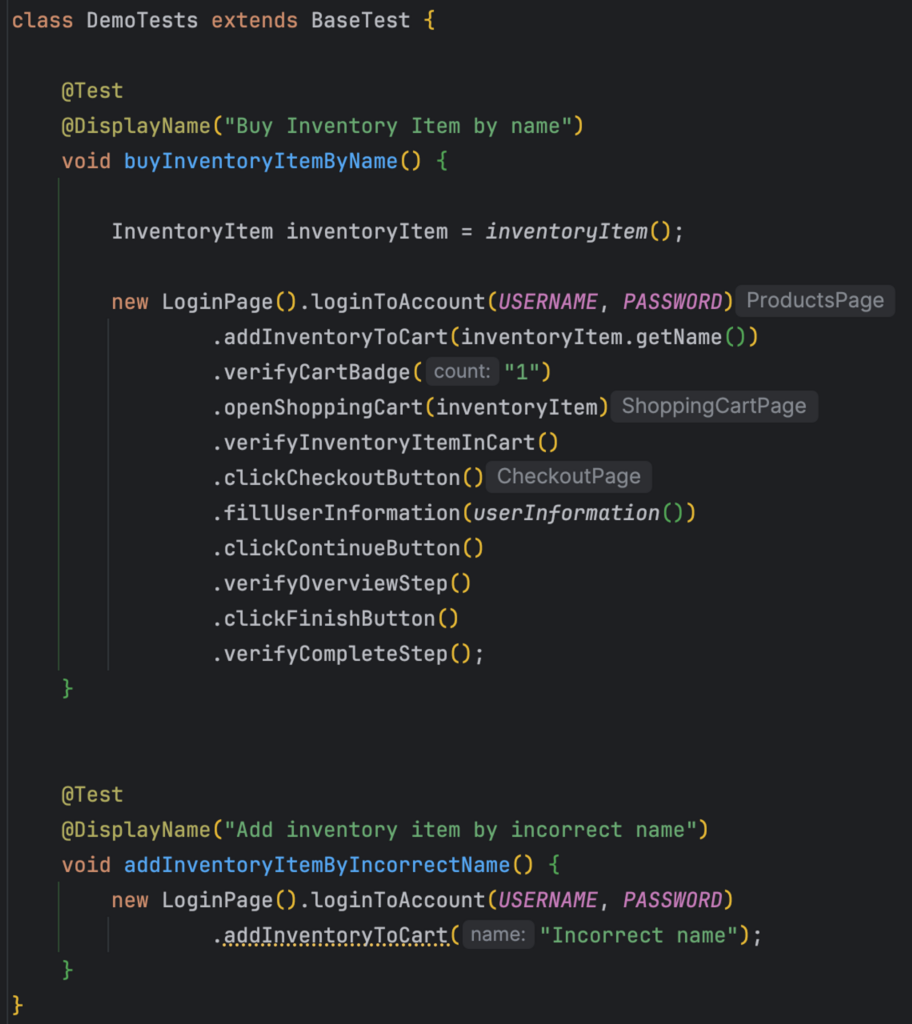
3. Generate test cases
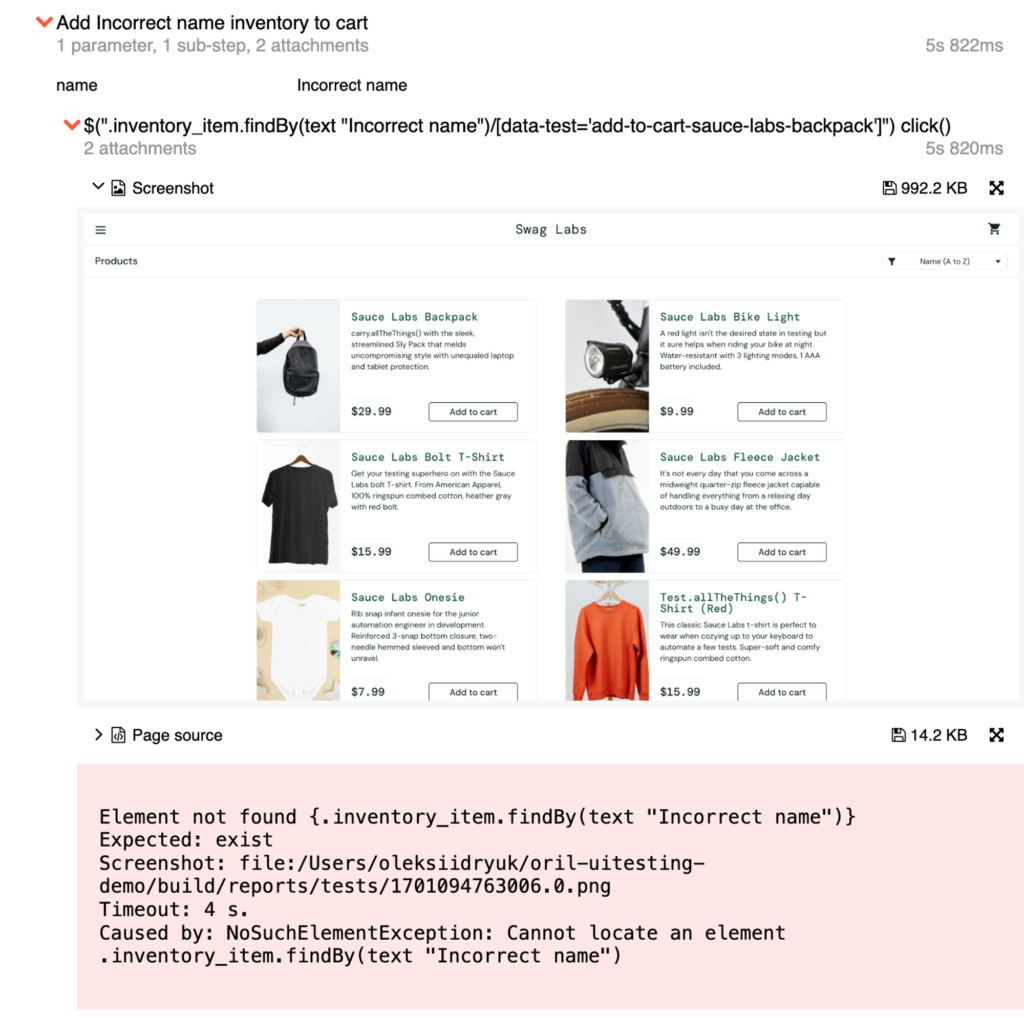
I’ve created a DemoTest class and implemented two tests: buying an inventory item by its name and attempting to add an item using an incorrect name.
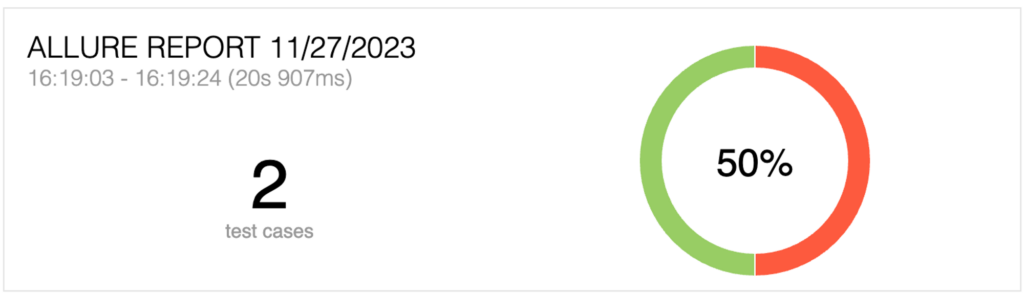
Generating and Managing Test Results with Allure Report
To view the test results after running the tests, you can utilize the allure serve command, opening a local link in your browser that displays a comprehensive report. This report includes all steps during tests, captures screenshots in case of test failures, and presents a page tree to investigate any issues.
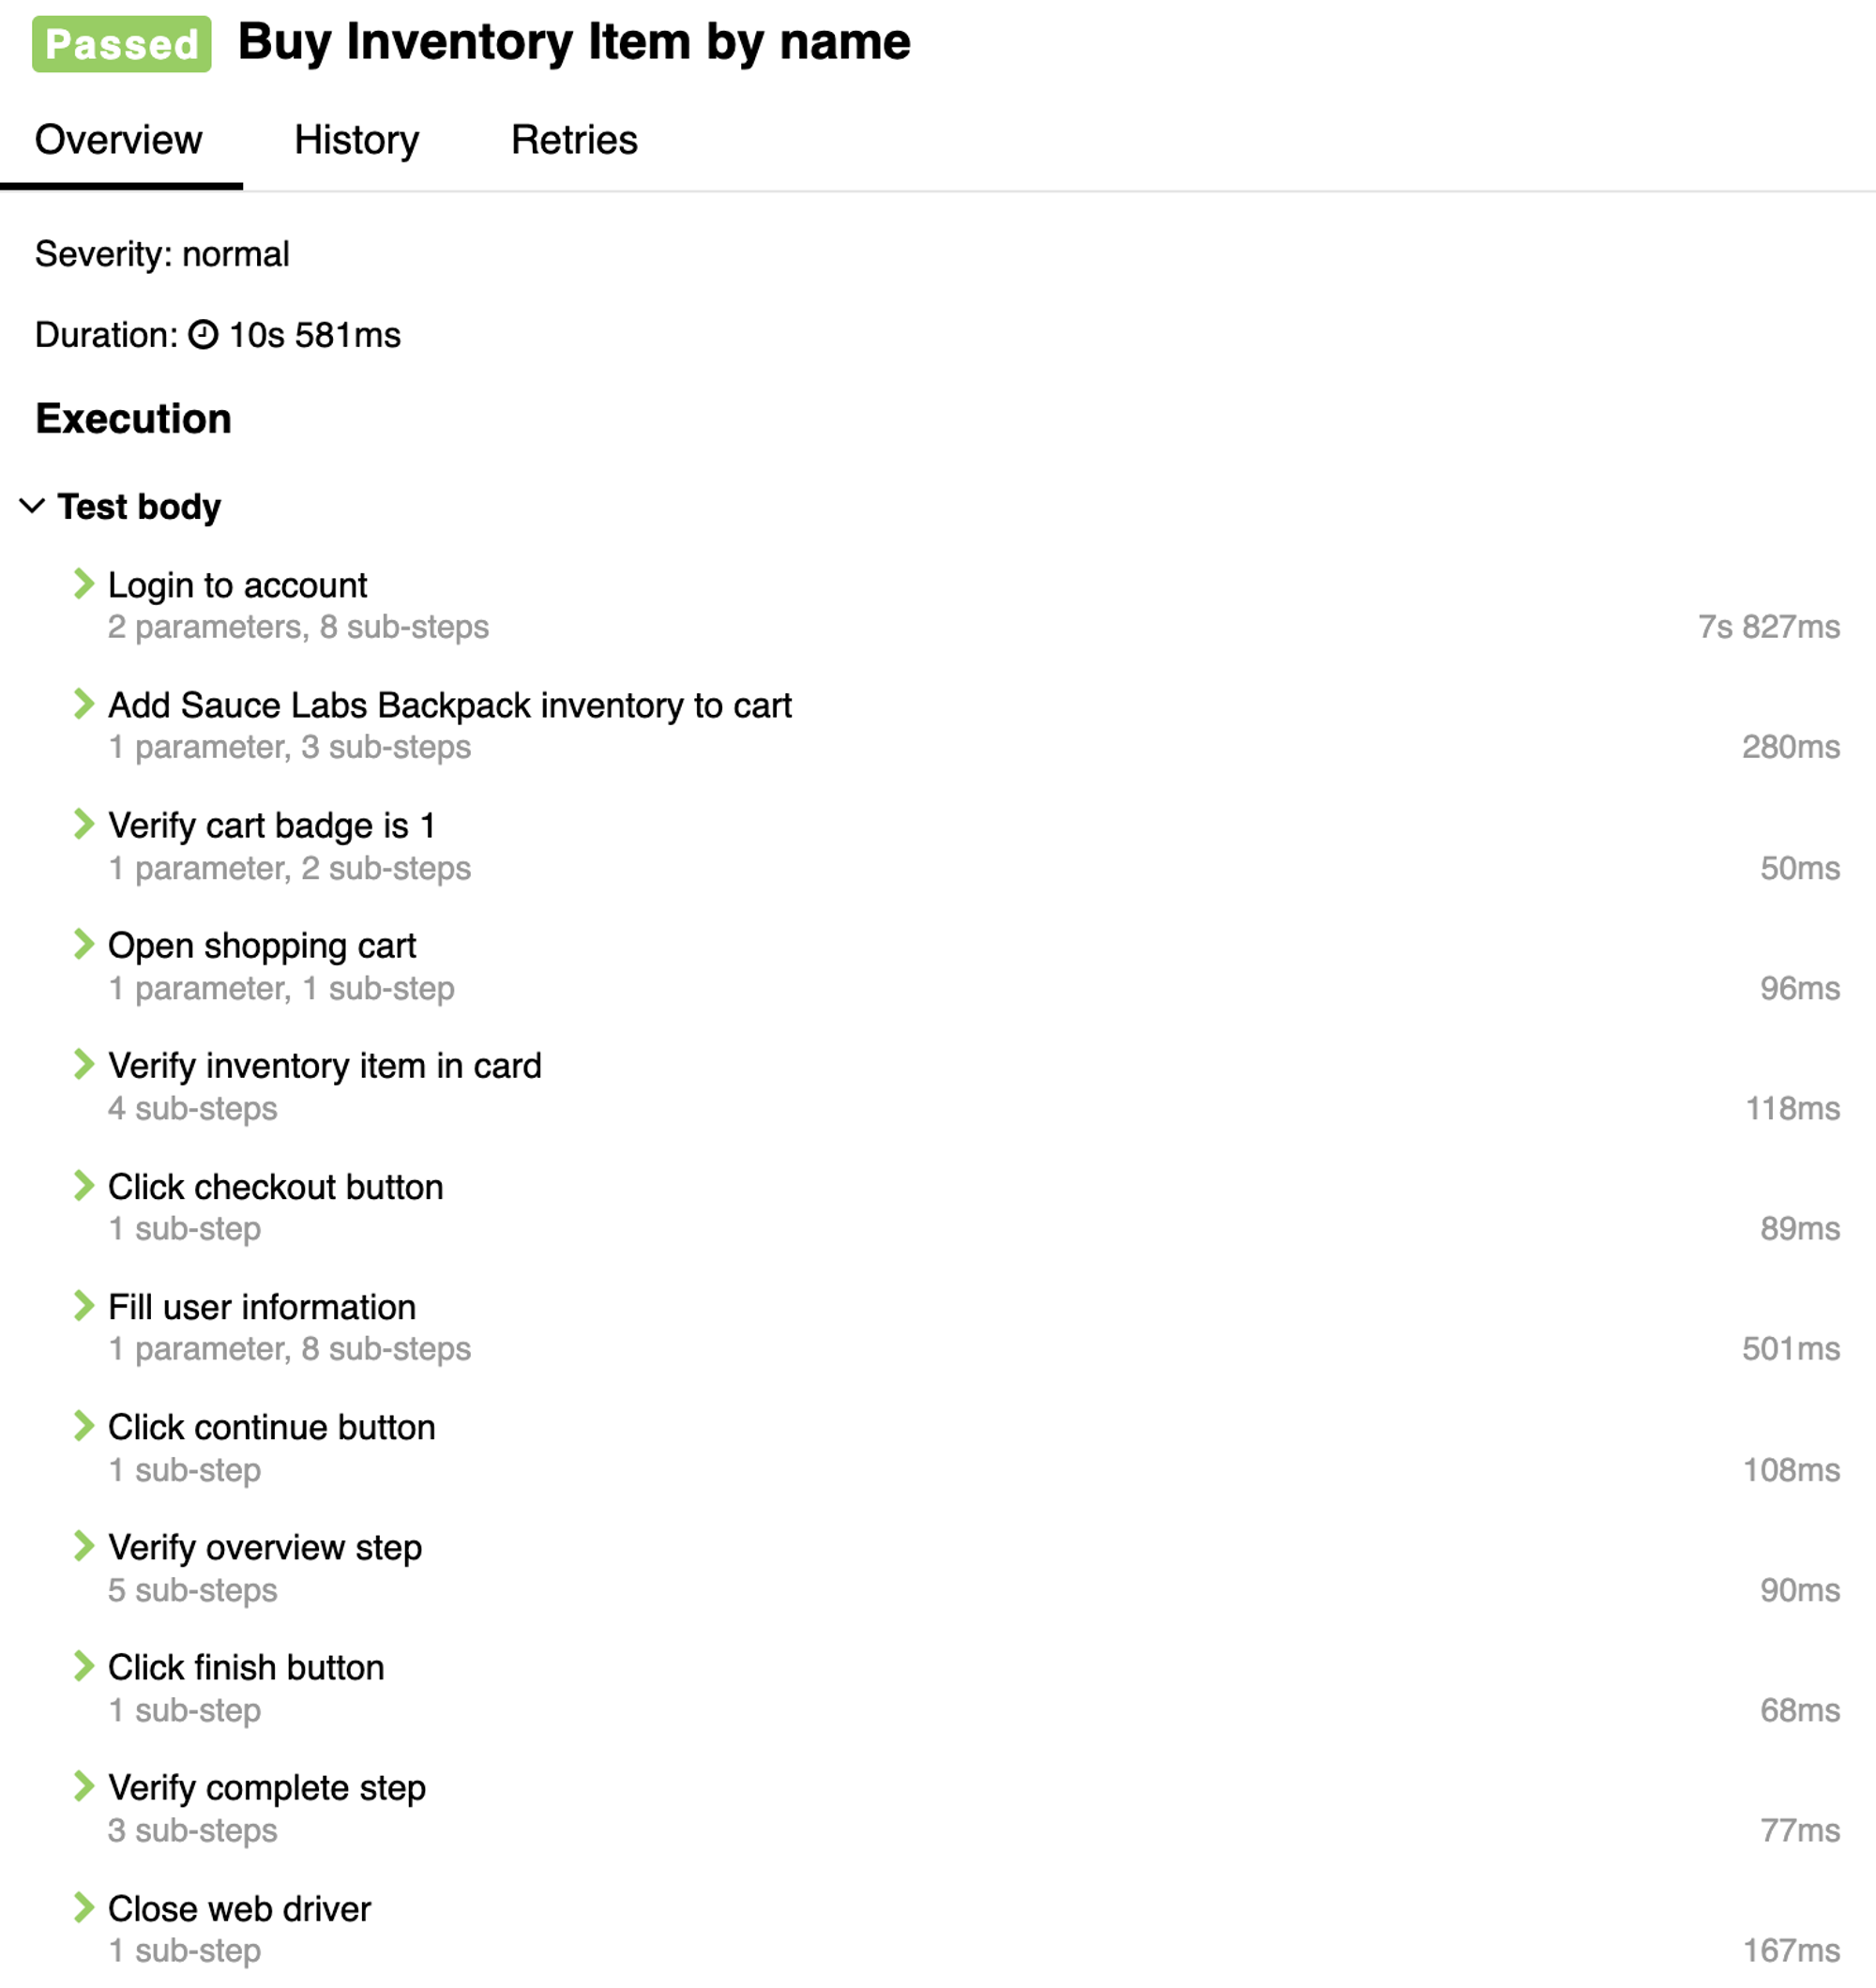
First, let’s manage the passed test, capturing all the steps executed during the test run and detailing the operations performed.
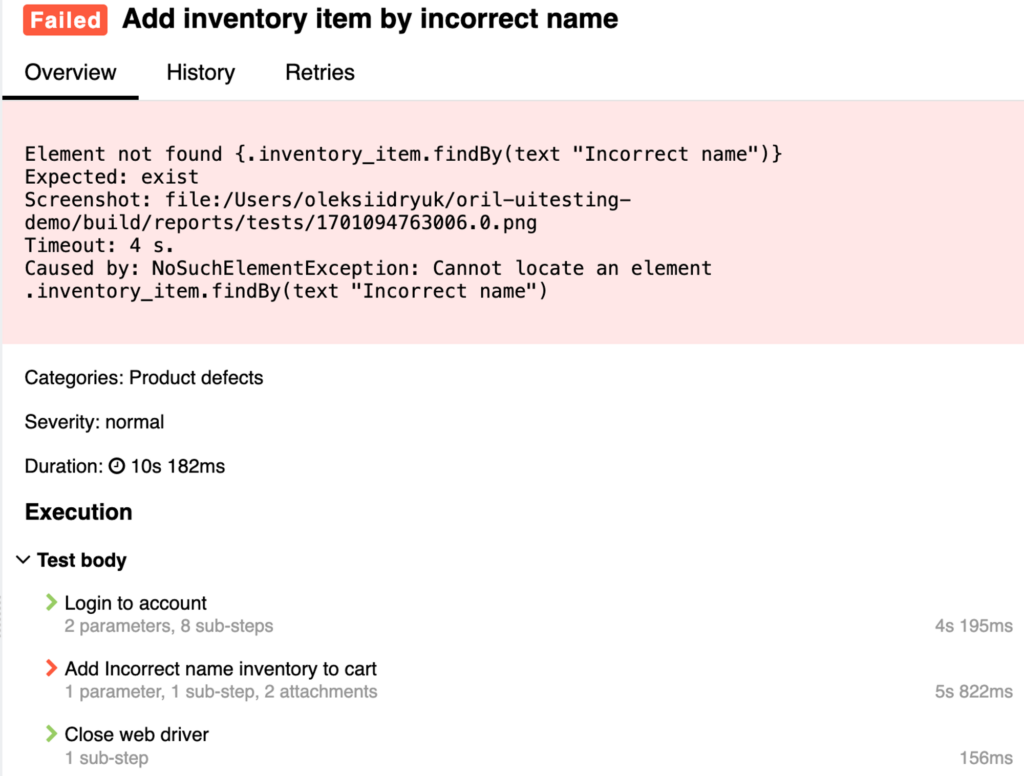
Secondly, let’s handle the failed test. The report provides insight into the step at which the test failed, along with a screenshot and the page source for further analysis.
To Sum Up
Selenide simplifies UI testing, making it accessible for experienced developers and those new to the field. It enhances software quality, ensuring applications are bug-free and perform well. Its integration into your development workflow can significantly reduce software errors, leading to better user experiences and more reliable applications. Consider Selenide for higher software standards and efficiency in your projects.


